Posing Rigged Models
Introduction
Investigation scenes often need human figures placed in specific positions — a witness standing at a window, a person crouching behind a vehicle, someone walking across a street at a particular moment. You don't need to build these figures from scratch. Pre-rigged models (provided with this knowledge base, sourced from asset libraries, or obtained through other means) already contain the control system that lets you bend joints, rotate limbs, and position the body.
This page covers posing only — the process of selecting bones inside an existing rig and moving them into the position you need. We are not covering how rigs are built (that's rigging), and we are not covering how poses change over time (that's animation). The goal here is simpler: given a rigged human model, put it into a specific stance.
Pose Mode
Blender's dedicated mode for manipulating bones without editing the rig itself.
FK & IK
Two control methods: rotate each joint individually (FK) or drag an end target (IK).
Reference Matching
Position figures to match photographs, video stills, or witness descriptions.
What Is a Rig?
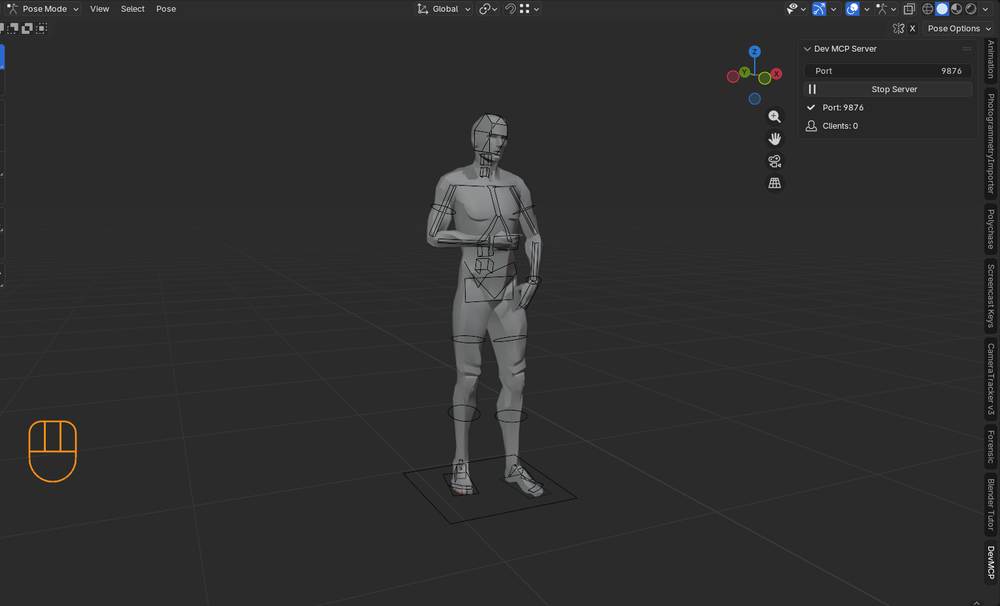
A rig is a skeleton hidden inside a 3D mesh. It consists of bones arranged in a parent-child hierarchy — the pelvis connects to the spine, the spine connects to the ribcage, the ribcage connects to the arms, and so on. When you rotate a bone, the mesh deforms to follow it, the same way skin stretches over a real skeleton.
You don't interact with the mesh directly when posing. You interact with the bones. The mesh follows automatically through an Armature modifier that binds it to the skeleton.
The Example Rigs
The models available in this project share the same bone structure: 33 bones organized in a clean hierarchy.
Root bone (root) — the master control. Moving this moves the entire figure.
From the root, the hierarchy branches:
- Lower body:
pelvis_torsoControl→pelvis_independent→thigh.L/thigh.R→calf.L/calf.R - Spine:
pelvis_torsoControl→lumbar1→lumbar2→ribcage - Upper body:
ribcage→clavicle.L/clavicle.R→upperArm→foreArm→hand - Head:
ribcage→neck1→neck2→head - Feet:
root→footControl.L/footControl.R→footArch→footIK
This naming convention follows the .L / .R suffix pattern for left and right sides, which is standard in Blender rigs. If you select a bone on the left side and press Ctrl + C then Ctrl + Shift + V, Blender mirrors the pose to the matching .R bone.
Entering Pose Mode
- Select the armature by clicking on the rig object (not the mesh). In the Outliner, this is the object with the stick-figure icon — named
Male RigorFemale Rigin the example files. - Switch to Pose Mode using the mode dropdown in the top-left of the viewport (where it says "Object Mode"), or press
Ctrl + Tabwith the armature selected.
In Pose Mode, the bones become selectable and color-coded. You can now rotate, move, and transform individual bones without affecting the underlying rig structure.
If you accidentally enter Edit Mode on the armature, you're editing the rig itself (bone positions, hierarchy, roll angles). This changes the rest pose permanently. For posing, you should be in Pose Mode, not Edit Mode.
FK vs. IK: Two Ways to Move a Limb
Rigs typically use two control strategies, and the example rigs use both.
Forward Kinematics (FK)
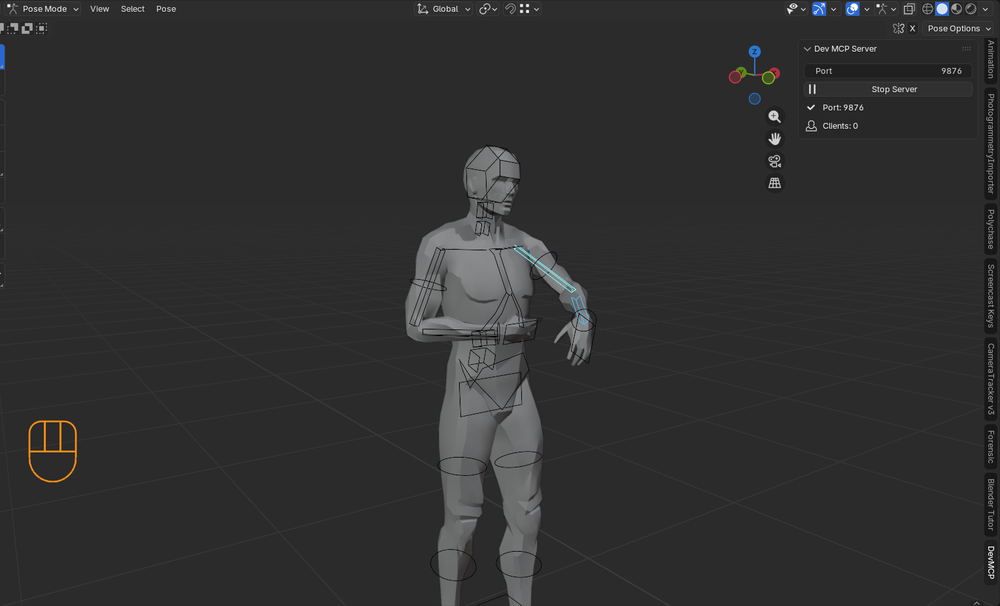
FK means you rotate each joint individually, starting from the root of the chain and working outward. To pose an arm with FK:
- Rotate the
clavicle(shoulder shrug) - Rotate the
upperArm(shoulder rotation) - Rotate the
foreArm(elbow bend) - Rotate the
hand(wrist angle)
Each bone affects everything below it in the chain. If you rotate the upper arm, the forearm and hand follow along because they're children of that bone.
The arms in the example rigs use FK. You pose them by selecting each bone in the chain and pressing R to rotate.
Inverse Kinematics (IK)
IK reverses the process. Instead of rotating each joint, you grab an end-point target and drag it to where you want it. The solver calculates the joint angles needed to reach that position.
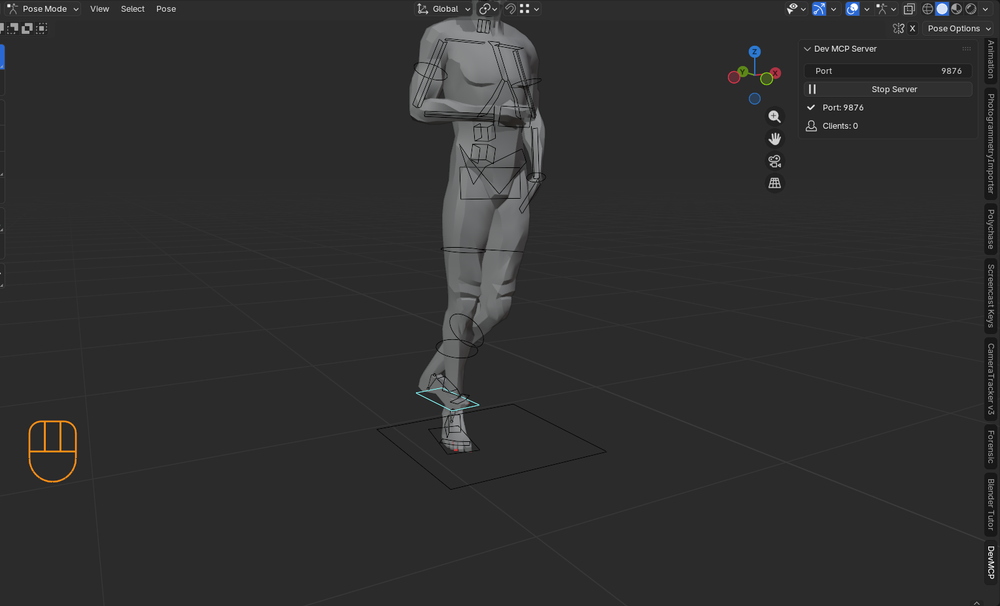
The legs in the example rigs use IK. The footControl.L and footControl.R bones are the IK targets — moving them positions the entire leg. The calf and thigh bones rotate automatically to keep the foot planted where you placed it.
This is why feet feel intuitive to pose: grab the foot controller, move it (G), and the knee and hip follow. It behaves like how you'd position a real foot — you place it on the ground and the leg adjusts.
When each is useful
| FK (Arms) | IK (Legs) | |
|---|---|---|
| Control | Precise per-joint rotation | Goal-driven end-point placement |
| Best for | Expressive arm gestures, pointing, holding objects | Planting feet on surfaces, walking stances |
| Workflow | Rotate each bone in sequence (R) | Move the foot controller (G) |
Key Bones and What They Control
Not all 33 bones need your attention for a basic pose. Here's a practical breakdown:
Body Core
| Bone | What it does |
|---|---|
root | Moves the entire figure. Use this for global position and overall body lean. |
pelvis_torsoControl | Controls the torso as a unit. Shift this to adjust the center of gravity. |
pelvis_independent | Rotates the hips independently from the spine. Key for weight-shift and contrapposto. |
lumbar1 / lumbar2 | Lower and upper lumbar spine. Subtle rotations here add natural curvature. |
ribcage | Chest rotation and tilt. Twisting the ribcage relative to the pelvis creates natural torso rotation. |
Head & Neck
| Bone | What it does |
|---|---|
neck1 / neck2 | Two-segment neck. Use both for natural head turns — the neck doesn't rotate from a single point. |
head | Head tilt and rotation. Where the person is looking. |
Arms (FK)
| Bone | What it does |
|---|---|
clavicle.L / .R | Shoulder shrug and forward/backward reach. Often overlooked but important for natural poses. |
upperArm.L / .R | Main shoulder rotation. |
upperArm_rotate.L / .R | Twist along the upper arm axis (forearm supination/pronation origin). |
foreArm.L / .R | Elbow bend. |
foreArm_rotate.L / .R | Forearm twist (rotating the wrist without bending it). |
hand.L / .R | Wrist angle. |
Legs (IK)
| Bone | What it does |
|---|---|
footControl.L / .R | Primary leg control. Move this to position the foot; the leg follows via IK. |
footArch.L / .R | Foot arch roll. Useful for tiptoeing or weight distribution. |
footToes.L / .R | Toe bend. |
Posing Step by Step
1. Start from the Ground Up
The difference between rest position and a posed state shows what bone manipulation achieves:
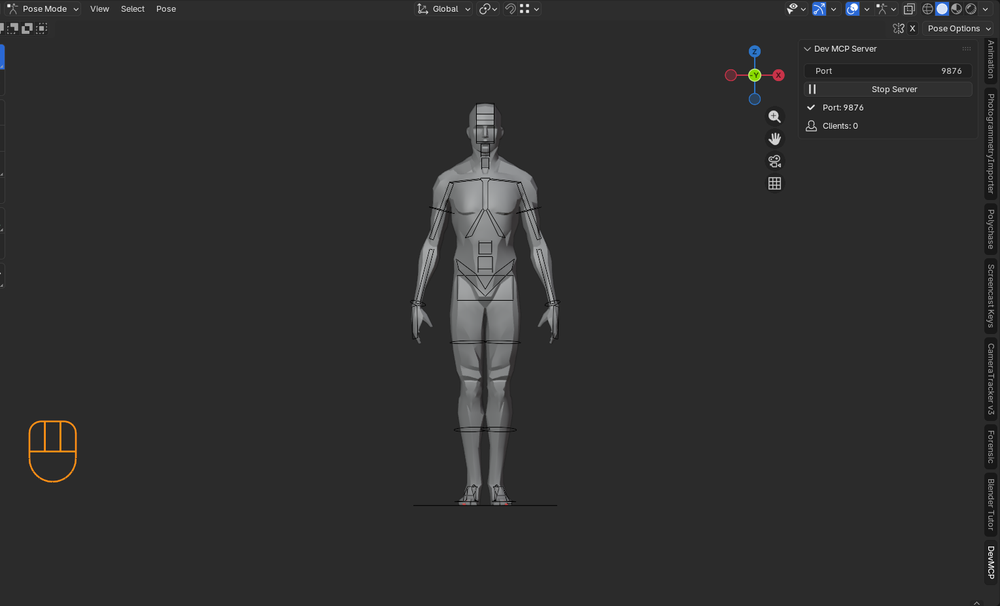
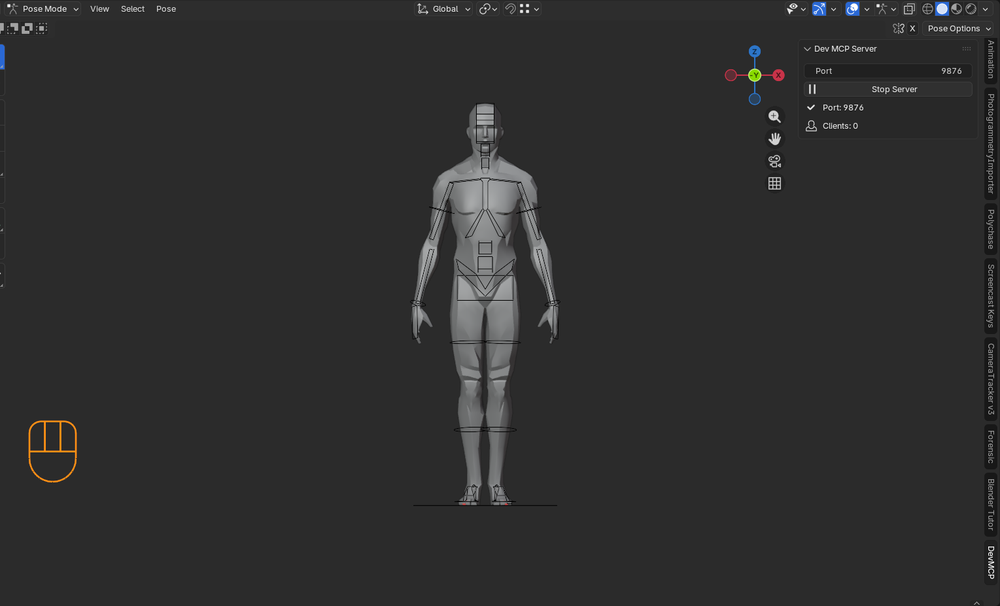
The most natural way to build a pose is bottom-up:
- Position the feet using the
footControlbones (Gto grab). Place them where you want the person to stand. - Adjust the root to set overall height and body position. Lowering the root with feet planted creates a crouching pose.
- Rotate the pelvis (
pelvis_independent) for weight shift — in a natural standing pose, weight is rarely distributed perfectly evenly. - Shape the spine using
lumbar1,lumbar2, andribcage. Small rotations across multiple spine bones look more natural than one large rotation on a single bone. - Pose the arms from shoulder to hand:
clavicle→upperArm→foreArm→hand. - Set the head direction using
neck1,neck2, andhead.
2. Use Reference
Load a reference image as a background image for your camera (or as a floating reference in the viewport via Add → Image → Reference). Pose the figure to match the reference as closely as possible. This is especially useful when you're reconstructing a specific moment captured in footage.
3. Check from Multiple Angles
A pose that looks correct from the front might be completely wrong from the side. Orbit around the figure frequently. Use Numpad 1 (front), Numpad 3 (side), and Numpad 7 (top) to check alignment from orthographic views.
Useful Operations
Rotate (R)
The primary posing tool. Select a bone and press R to rotate. Constrain to an axis by pressing R then X, Y, or Z. For local bone axis (usually what you want), press the axis key twice: R → Y → Y rotates around the bone's local Y axis.
Grab (G)
Move a bone in world space. Mainly useful for IK targets (foot controls) and the root bone. Avoid translating FK bones — they're designed to be rotated, not moved.
Reset Pose
- Clear rotation on selected bone:
Alt + R - Clear location on selected bone:
Alt + G - Reset entire pose to rest position: Select all bones (
A), thenAlt + RandAlt + G
Mirror Paste
Pose one side, then mirror it:
- Select the posed bones on one side
Ctrl + C(Copy Pose)Ctrl + Shift + V(Paste Mirrored)
This works because of the .L / .R naming convention.
Common Issues
The Mesh Doesn't Follow
If you rotate a bone and the mesh stays still, the mesh likely doesn't have an Armature modifier pointing to the correct rig. Select the mesh, check the Modifiers panel, and verify there's an Armature modifier with the right target object.
Joints Bend the Wrong Way
IK solvers can flip a joint if the pole angle is ambiguous — for example, a knee bending sideways instead of forward. Slightly pre-rotate the problematic joint (by giving the thigh a tiny rotation) to hint the solver in the right direction before moving the IK target.
Pose Looks Stiff
Real people don't have perfectly zeroed-out spines, symmetrical shoulders, or identical arm positions. Add slight asymmetry: shift weight to one leg, tilt the head a few degrees, rotate the ribcage relative to the pelvis. Even 2-3 degrees of offset makes a significant difference.
IK Foot Slides When Moving Root
If you move the root bone and the feet slide along instead of staying planted, that's expected behavior — the foot IK targets are children of the root. Move the feet back into position after adjusting the root, or position the root first and the feet second.
Investigation Context
Posing human figures in an investigative scene serves specific purposes:
- Sightline analysis: Positioning a figure at a specific location to test what they could have seen from that vantage point and body position.
- Witness account testing: Placing a figure in the position described by a witness to evaluate whether their account is spatially plausible.
- Scale reference: A human figure at correct height provides immediate spatial context for distances and proportions in a scene.
- Event reconstruction: Positioning multiple figures at specific moments to test whether described interactions are physically possible given the spatial constraints.
When posing for these purposes, accuracy of position and body orientation matters more than visual polish. A figure facing the wrong direction by 15 degrees could invalidate a sightline analysis. Document the rationale for the pose — what reference it's based on and what assumptions were made.
Documentation for Methodology
What to document when posing figures
In Your Method Section
- Model Source: Origin of the rigged model (e.g., "BVI Knowledge Base example rig," "Mixamo," "custom scan").
- Software Version: Blender [Version].
- Body Dimensions: Any scaling applied to match known or estimated subject height.
In Your Decision Log
- Reference material used for the pose (photo, video frame, witness description)
- Specific bone rotations for key joints if precision matters
- Assumptions about body position, stance, or orientation
- Whether the pose represents a specific moment or a general position
- Date the pose was created and last modified
Verification
- Compare the posed figure against the reference from multiple angles
- Verify the figure's eye-level aligns with the intended height above ground
- Cross-reference with any available spatial measurements
Common Limitations
- Pre-rigged models represent generic body proportions; they may not match the specific physique of a real individual.
- Clothing, carried objects, and detailed hand positions are not represented by basic rigs.
- Poses are static approximations of dynamic body positions.
Example Methodology Statement
"Human figures were positioned using the BVI reference rig (33-bone armature, IK legs, FK arms) in Blender [Version]. The male figure at Position A was posed to match the body orientation visible in Source B (CCTV frame at timestamp 12:04:32). The figure was scaled to [height] based on [reference]. Foot placement was set to ground level at coordinates [X, Y]. Torso rotation and head direction were estimated from the reference frame with an approximate accuracy of +/- 10 degrees."
Related Pages
- Scene Management — How to link rigged models into your master scene