QGIS Baseline Setup
Introduction
The baseline workflow is the first step of the QGIS section. It establishes the foundation of your QGIS environment for geospatial analysis and 3D reconstruction: the settings that keep every later layer aligned.
The workflow was inspired by this video, adjusted slightly for flow. The goal is a geospatial base map that serves as the foundation for reconstruction in Blender: a satellite image, a custom CRS centered on your site, and an origin point. Once set up, you can add further layers (building footprints, roads, DEM) that all align exactly with each other and with Blender.
Usage
Load a satellite basemap· QuickMapServices
Set up QuickMapServices and add a satellite basemap. Google Satellite Hybrid is a good choice. If the provider you want is not in the catalog, add it as a custom tile service.
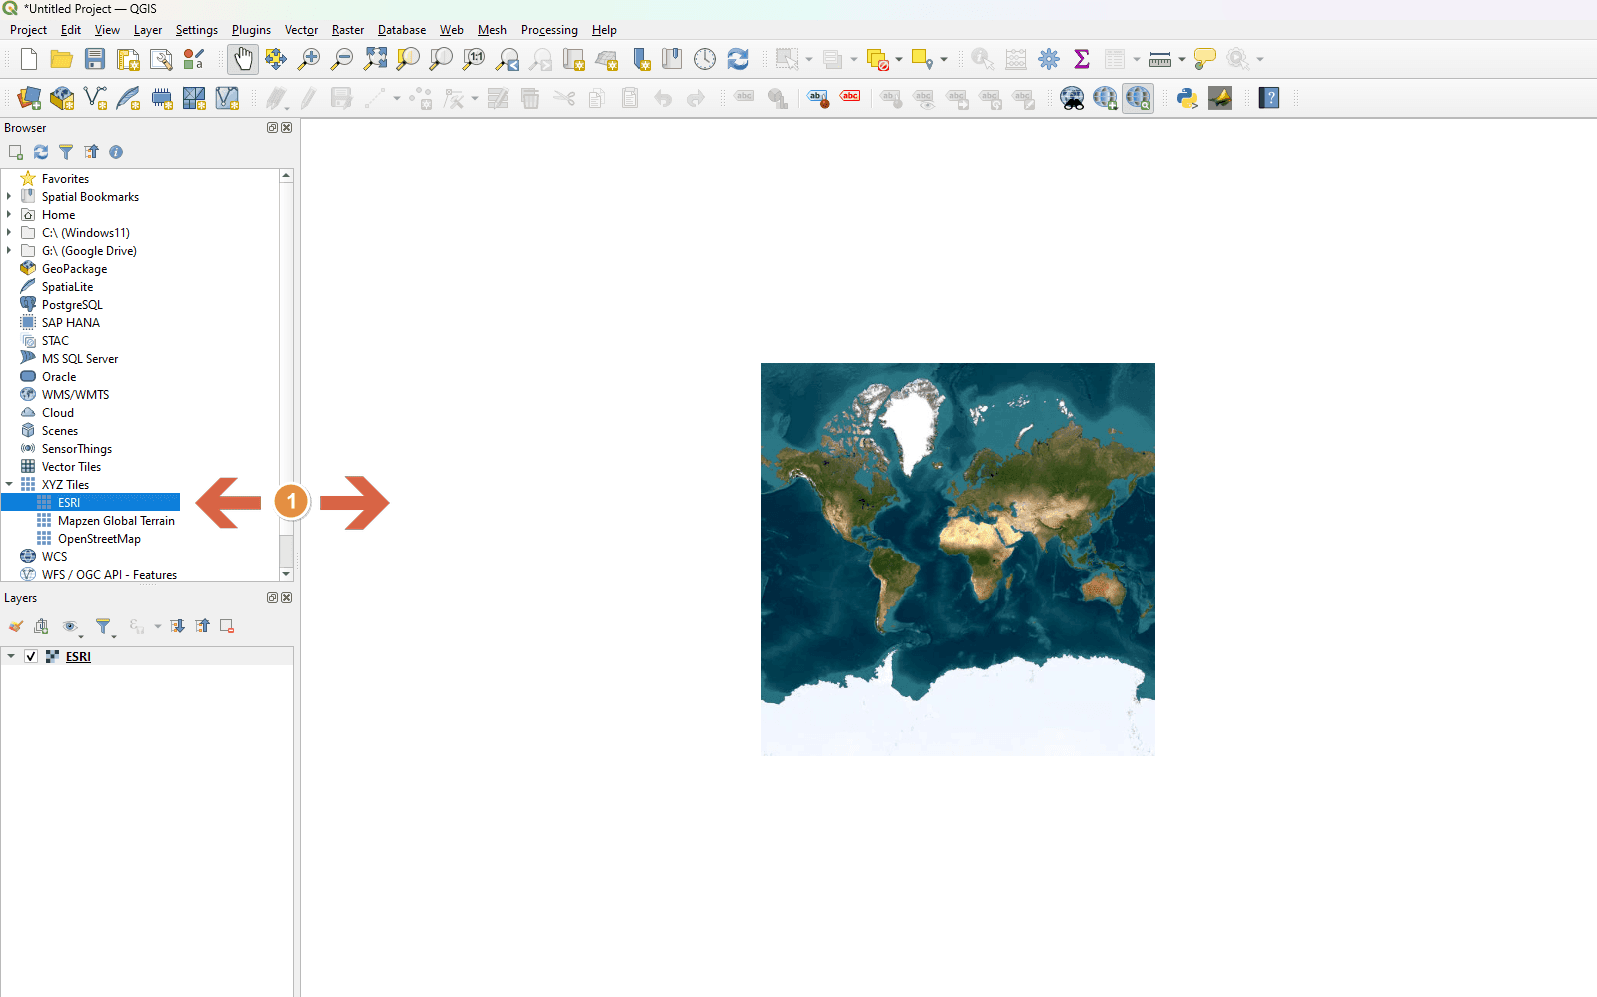
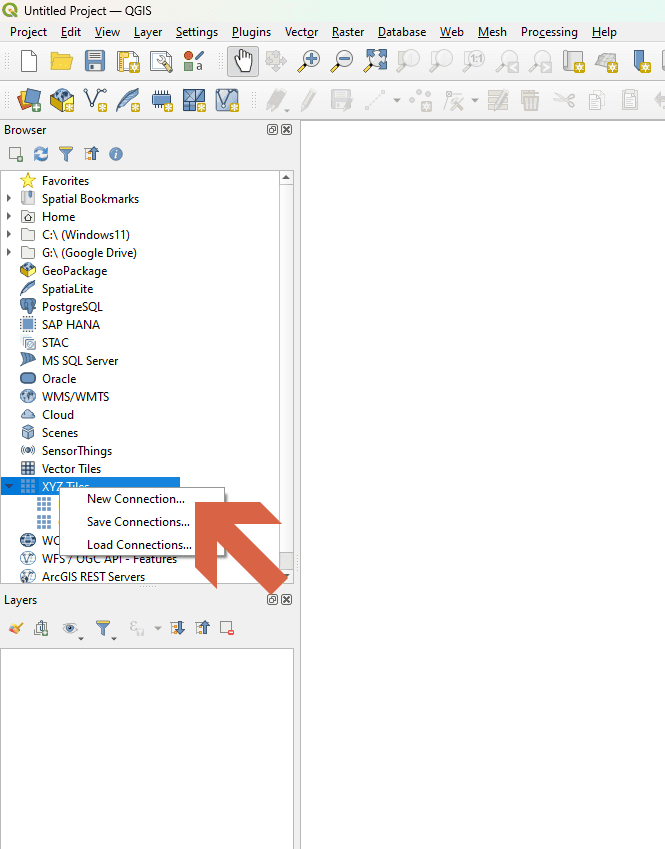
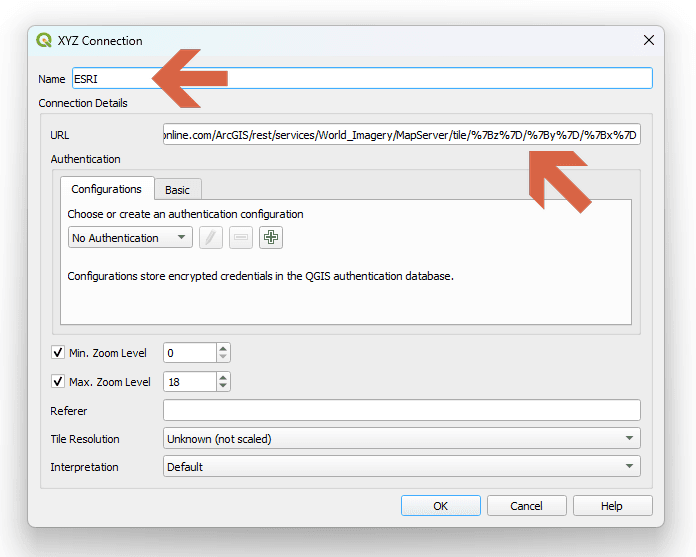
Custom tile server (Esri World Imagery):
https://server.arcgisonline.com/ArcGIS/rest/services/World_Imagery/MapServer/tile/%7Bz%7D/%7By%7D/%7Bx%7D
Create the orthographic CRS· custom projection
Right-click your location on the basemap and copy the coordinates, then create a custom CRS centered on that point. In Settings > Custom CRS, open the User Defined CRS tab, click the plus icon, enter a name, and paste the template below with Your Latitude and Your Longitude replaced by the copied coordinates. Validate and press OK. Custom CRSs are stored in your QGIS user database (see the QGIS documentation).
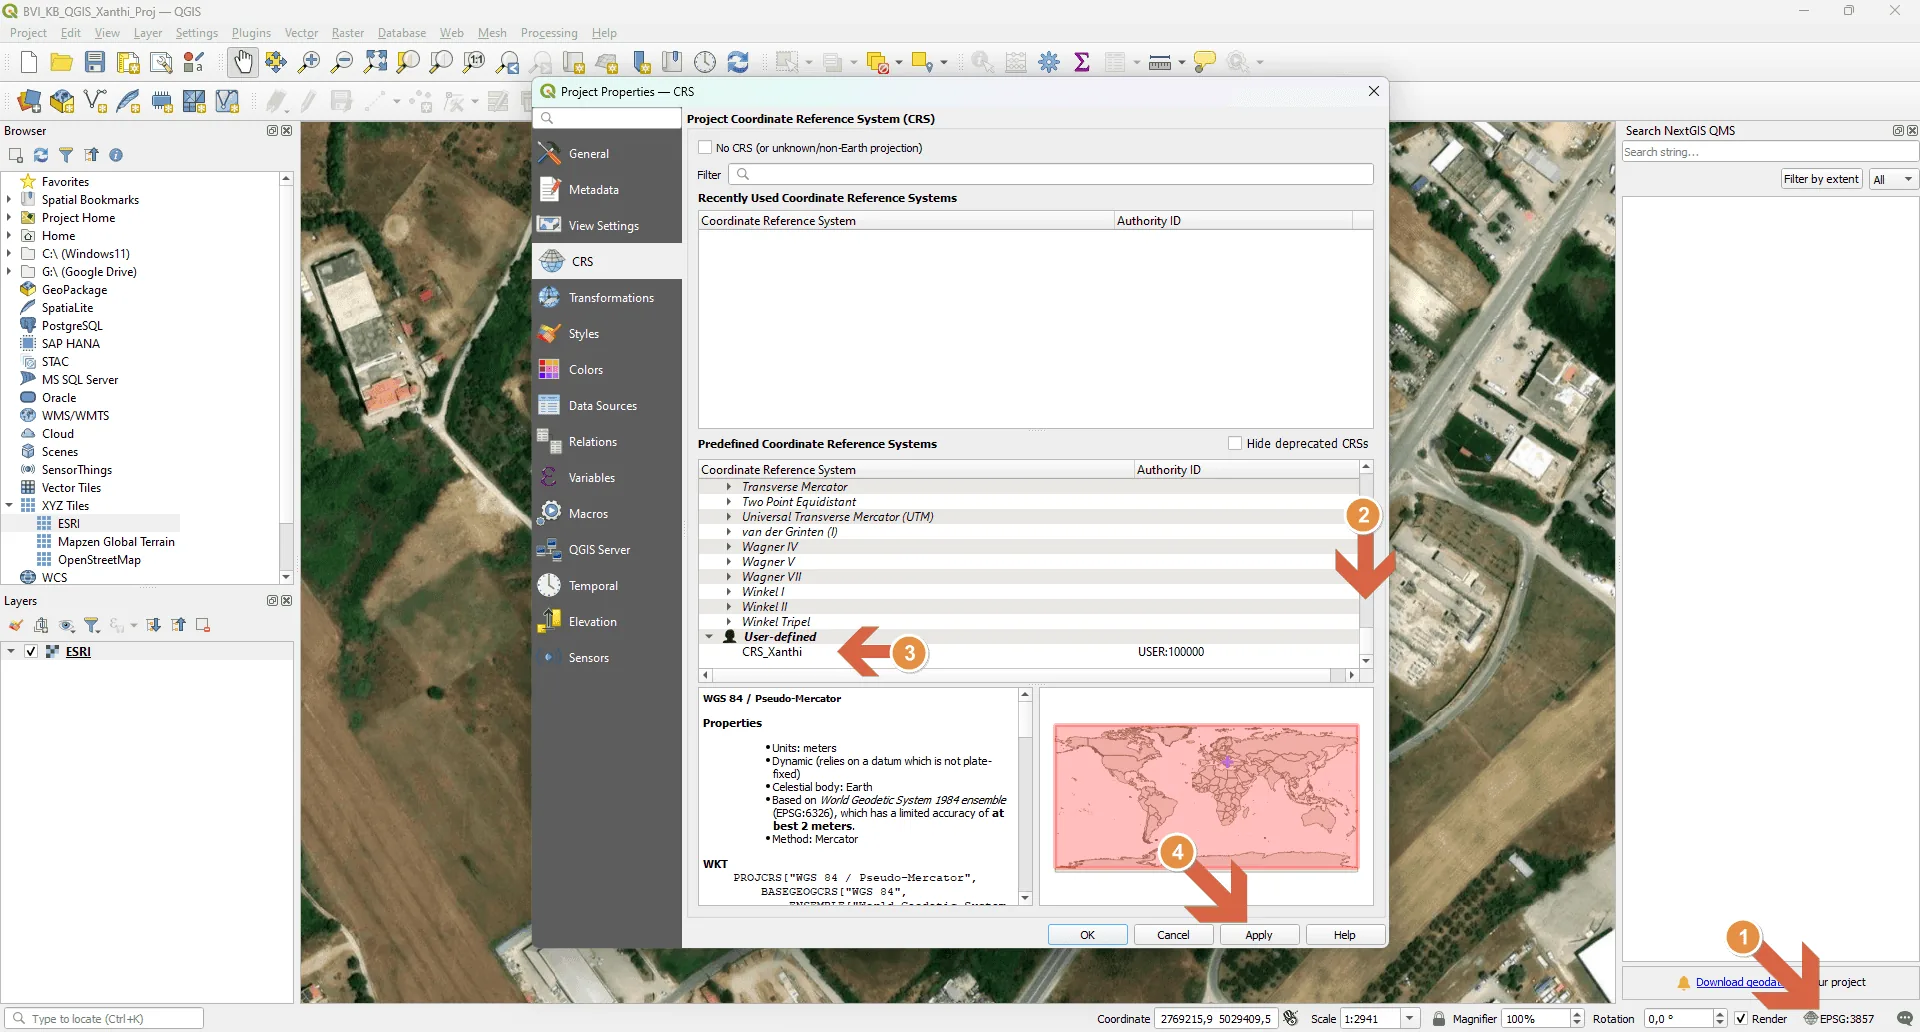
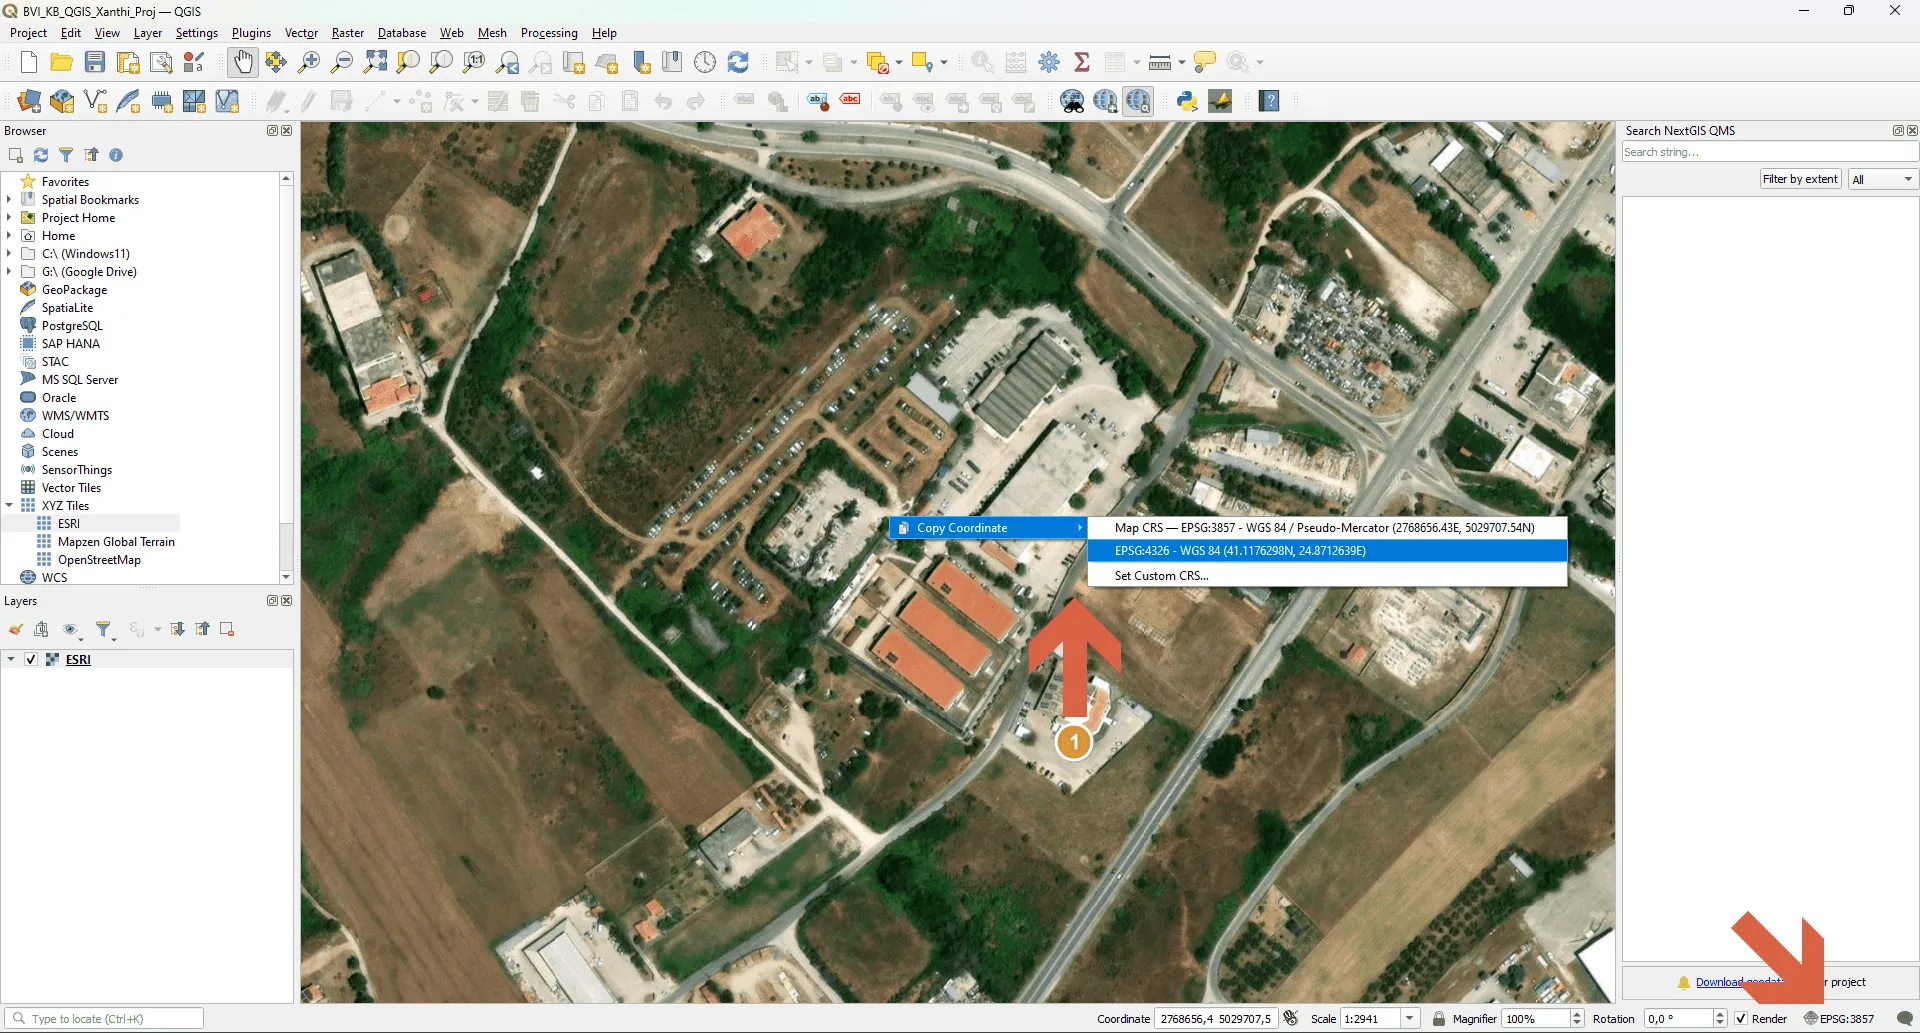 Right click on your location and copy the Coordinates
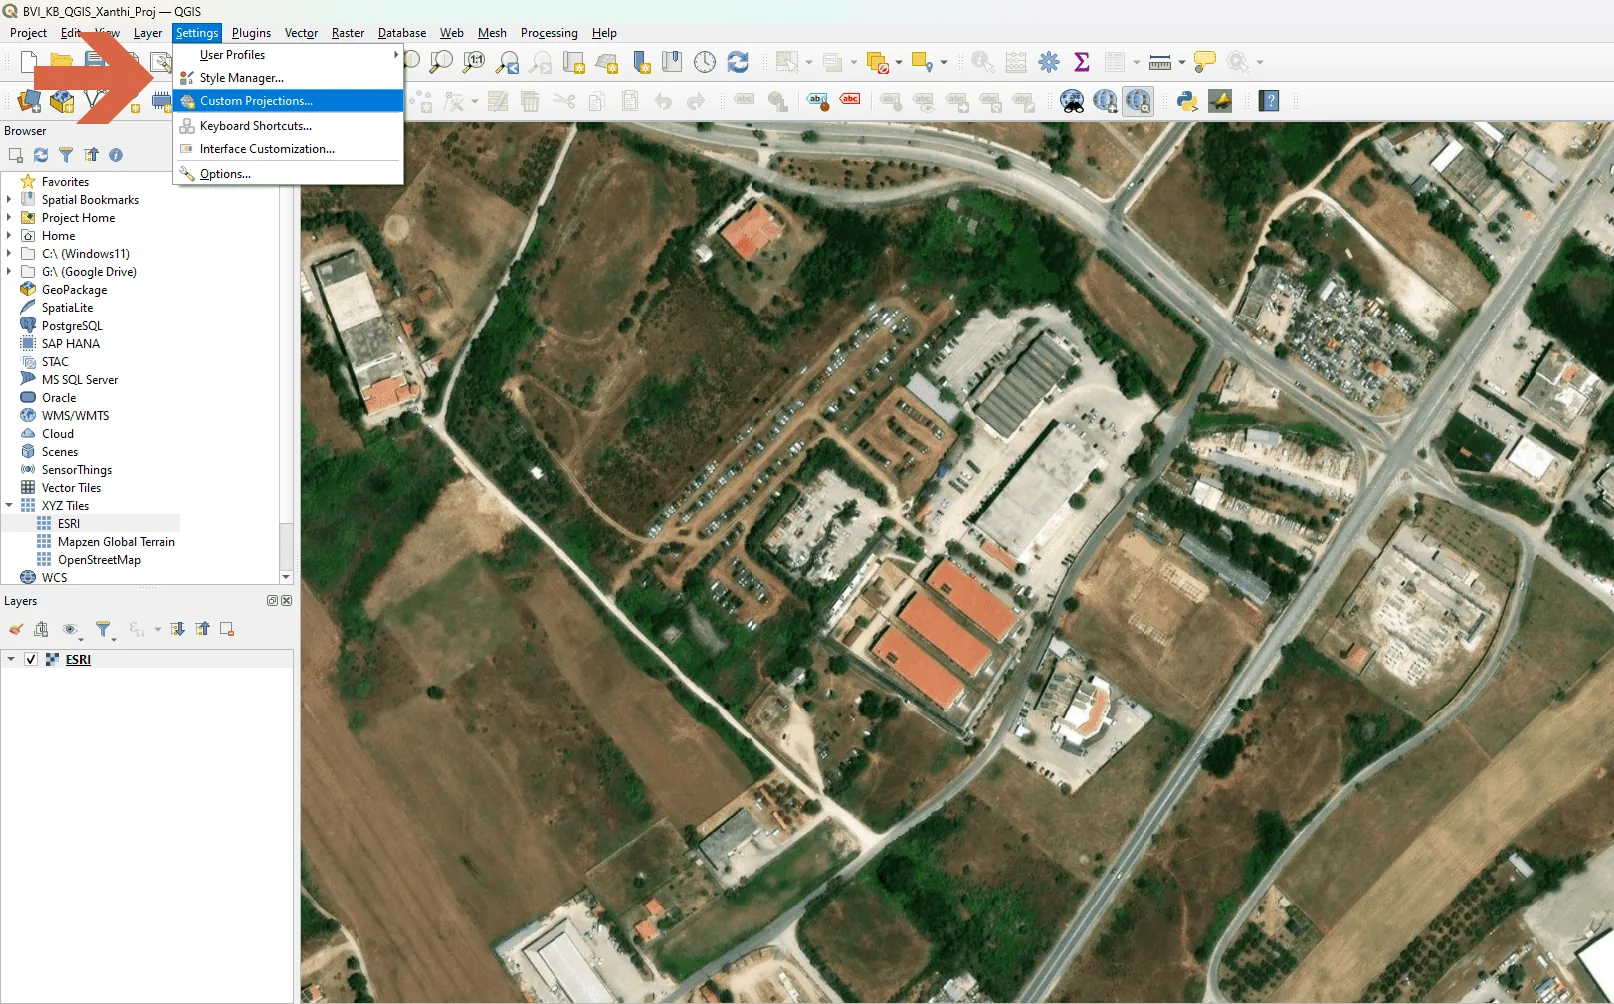 Go to settings and click 'custom projection'Right click on your location and copy the Coordinates
PROJCS["Orthographic",
GEOGCS["GCS_WGS_1984",
DATUM["WGS_1984",
SPHEROID["WGS_1984",6378137,298.257223563]],
PRIMEM["Greenwich",0],
UNIT["Degree",0.0174532925199433]],
PROJECTION["Orthographic"],
PARAMETER["latitude_of_origin",<Your Latitude>],
PARAMETER["central_meridian",<Your Longitude>],
PARAMETER["false_easting",0],
PARAMETER["false_northing",0],
UNIT["Meter",1]]
Set the origin point· anchors the scene
The origin point is the reference that keeps your data aligned in Blender. Create a new point shapefile in the custom CRS, add one point at the center of your site, then use the vertex tool to set its X and Y coordinates to 0. Save the edits.
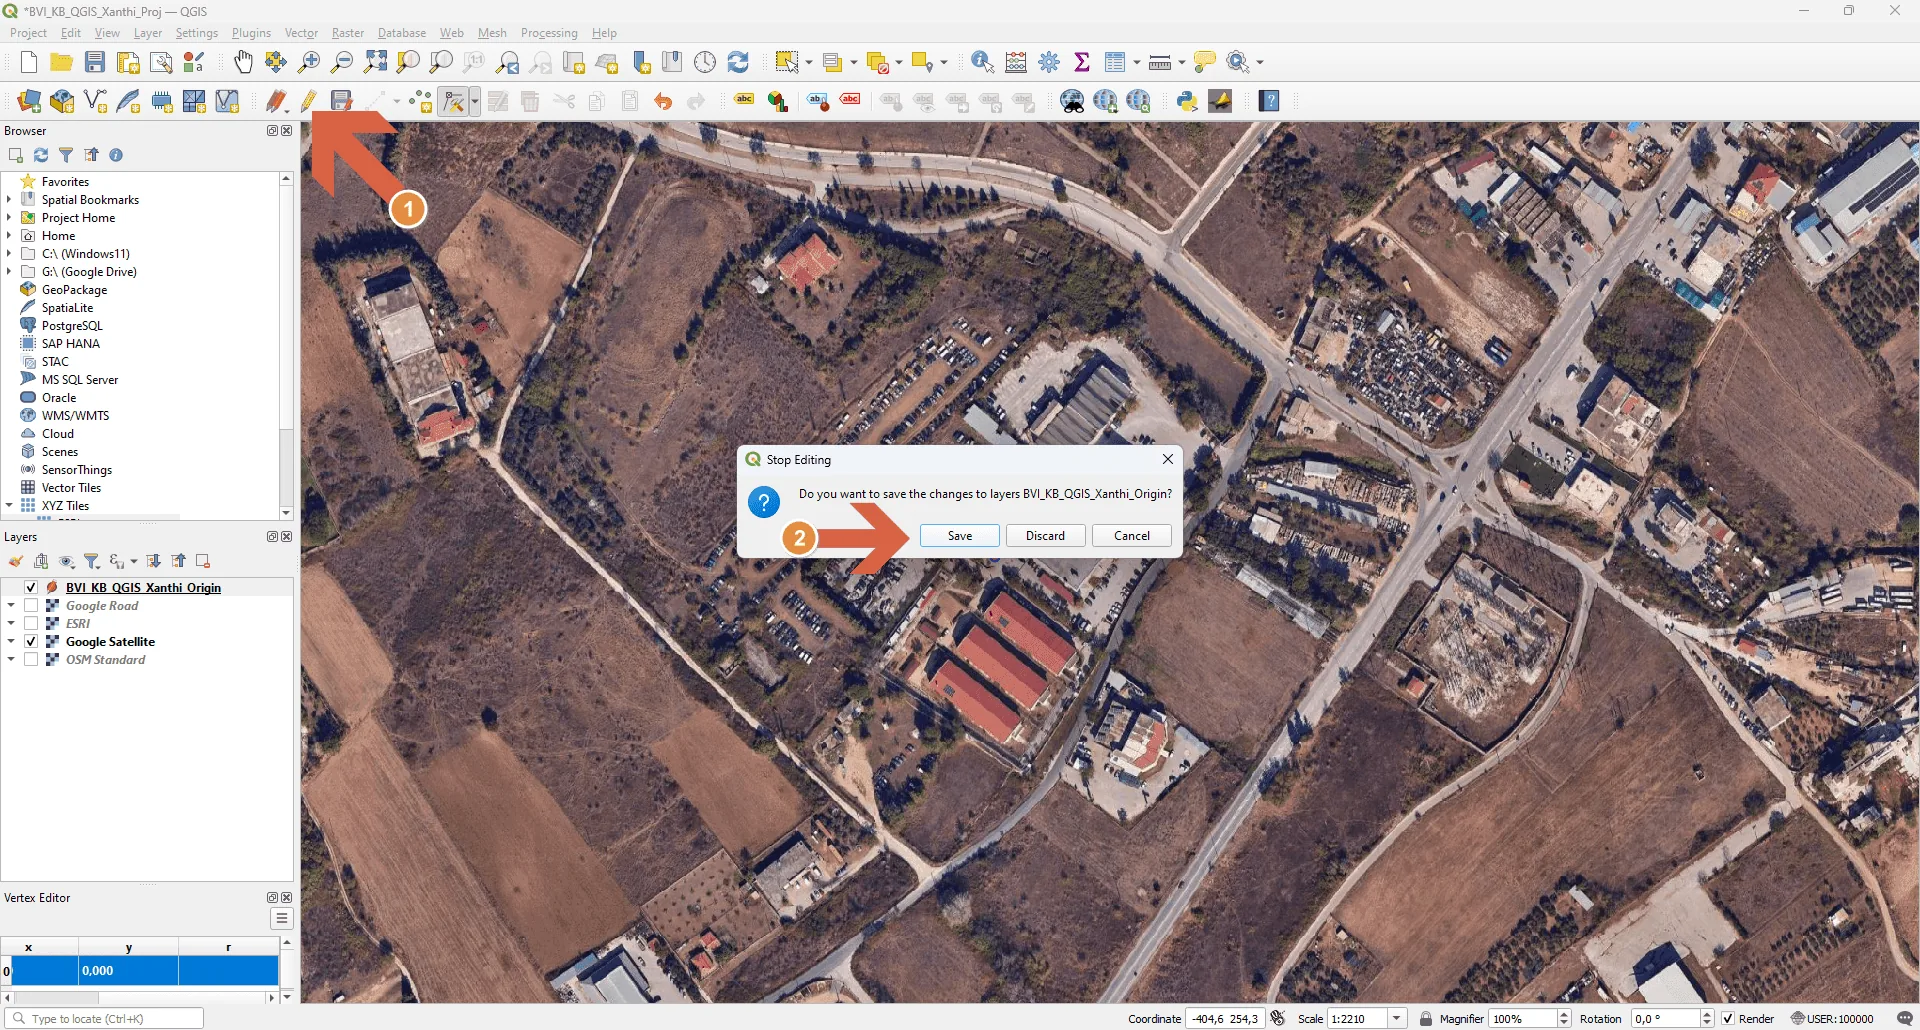 (1) Click the pencil icon again to exit edit mode, (2) Save the edits to our new layer
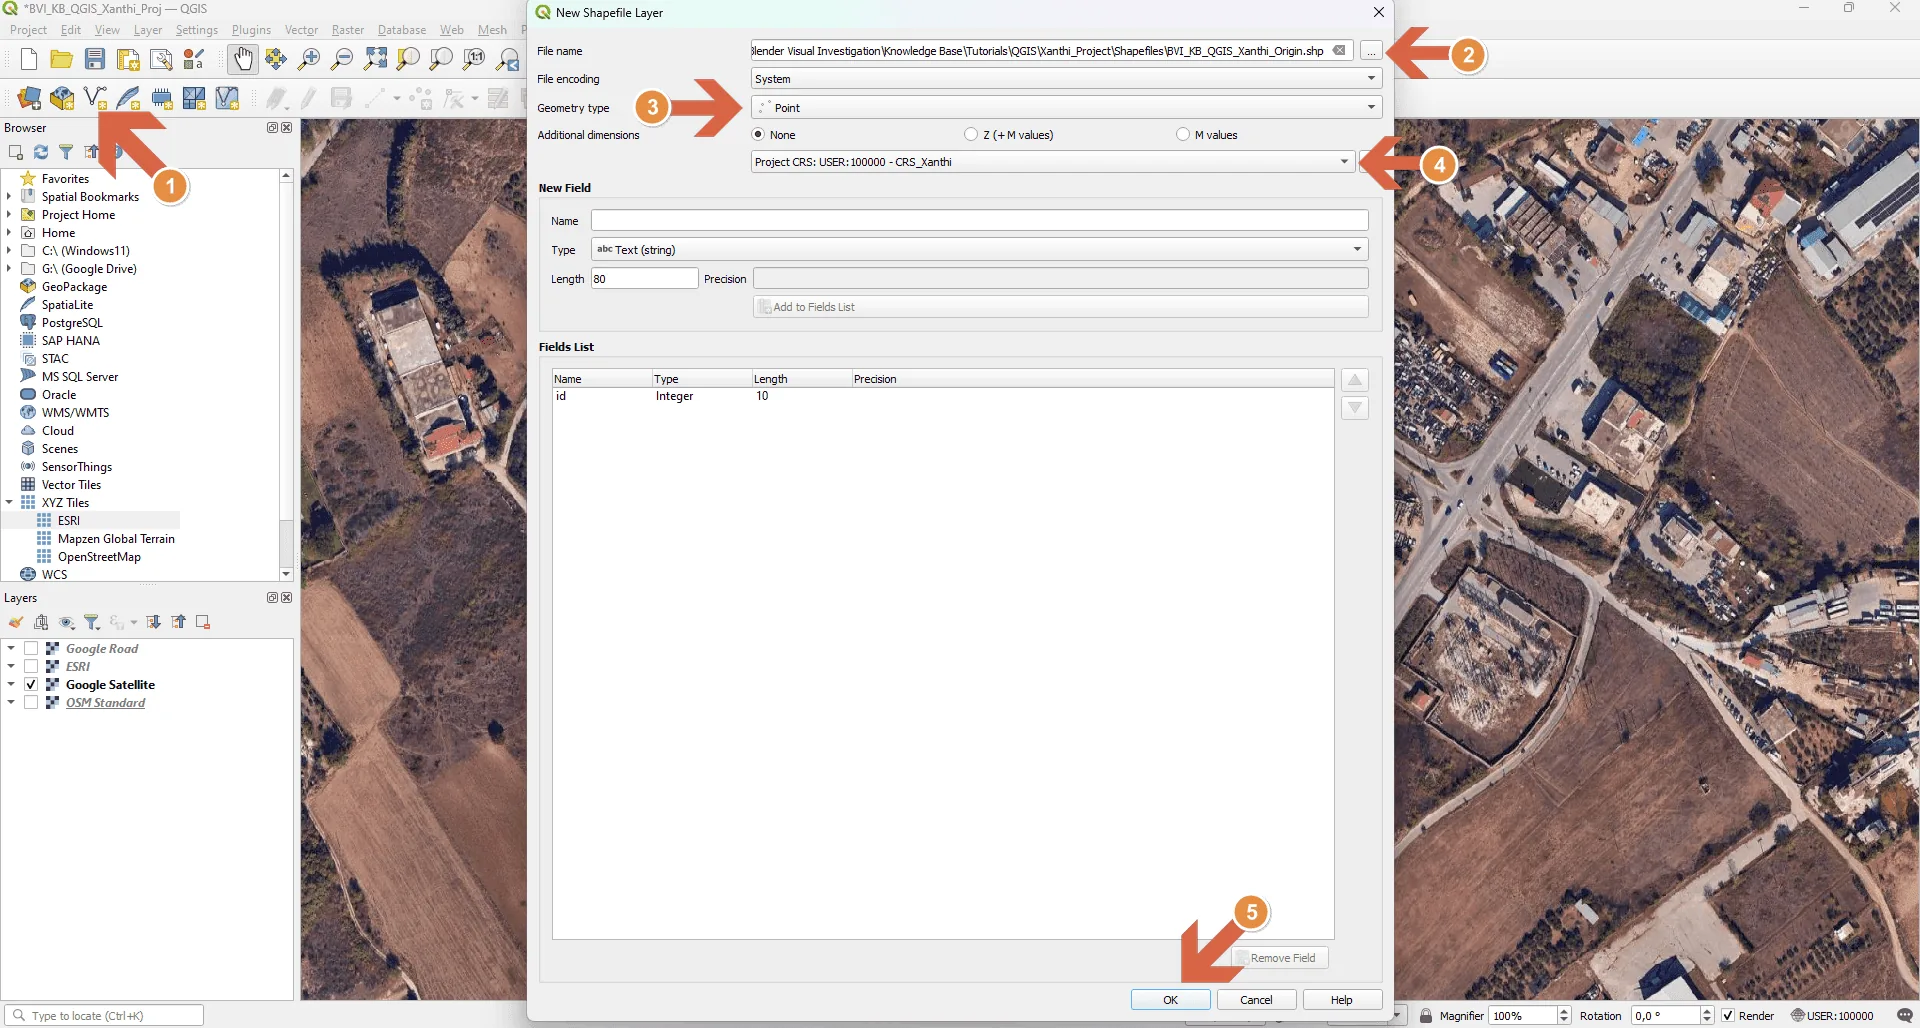 (1) Select New Shapefile layer, (2) Set up file name and save location, (3) Select Point geometry type, (4) Select the CRS that we set up earlier, (5) click OK
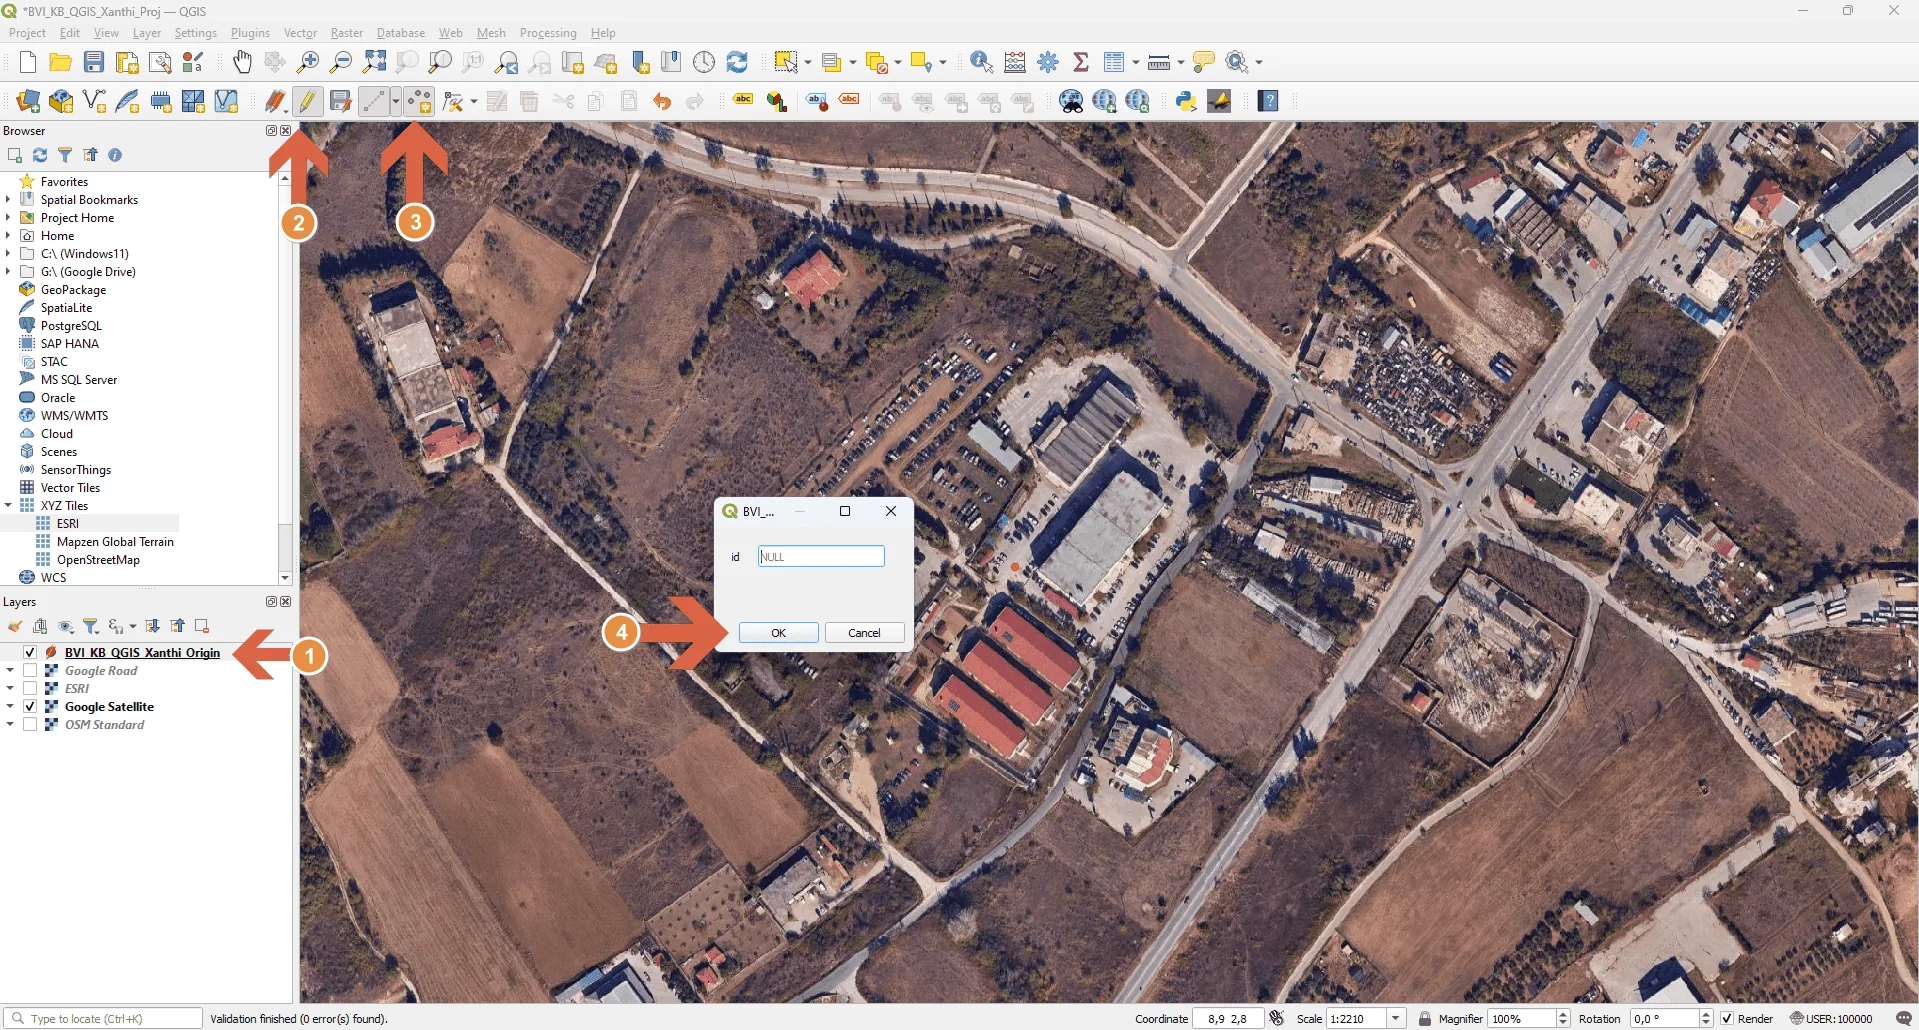 (1) Make sure the point layer is selected, (2) click the toggle editing pencil, (3) select add point feature, (4) click on the map to add the point and give an ID or leave empty, then click okay to save(1) Click the pencil icon again to exit edit mode, (2) Save the edits to our new layer(1) Select New Shapefile layer, (2) Set up file name and save location, (3) Select Point geometry type, (4) Select the CRS that we set up earlier, (5) click OK
Define capture regions· export areas
Set up micro, mesa, and macro capture regions as layers in QGIS to visualize the area you need to cover with different data types. It also makes it easier to export data for specific areas later on. Order the layers into groups, and style them (opacity, outline color) so the regions read clearly.
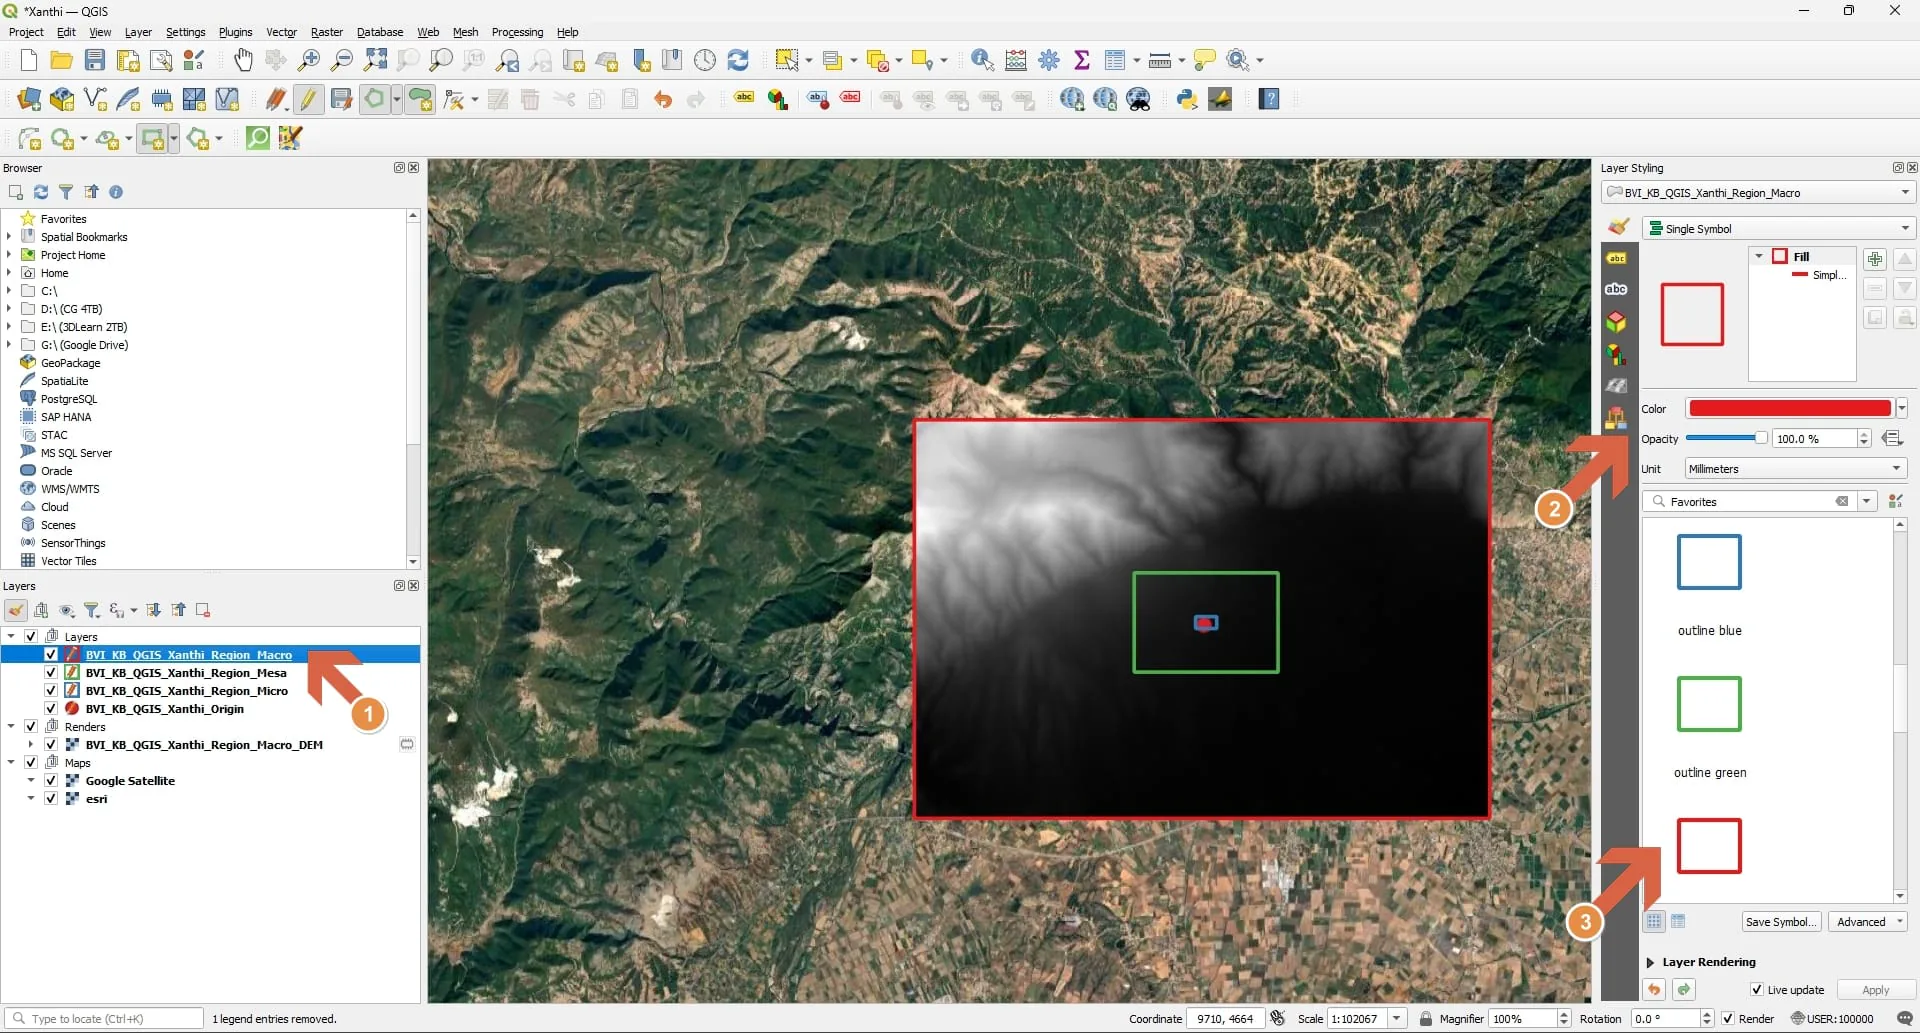 You can style different layers by selecting a layer (1), and, for example, adjust the opacity (2) or create a colored outline (3)
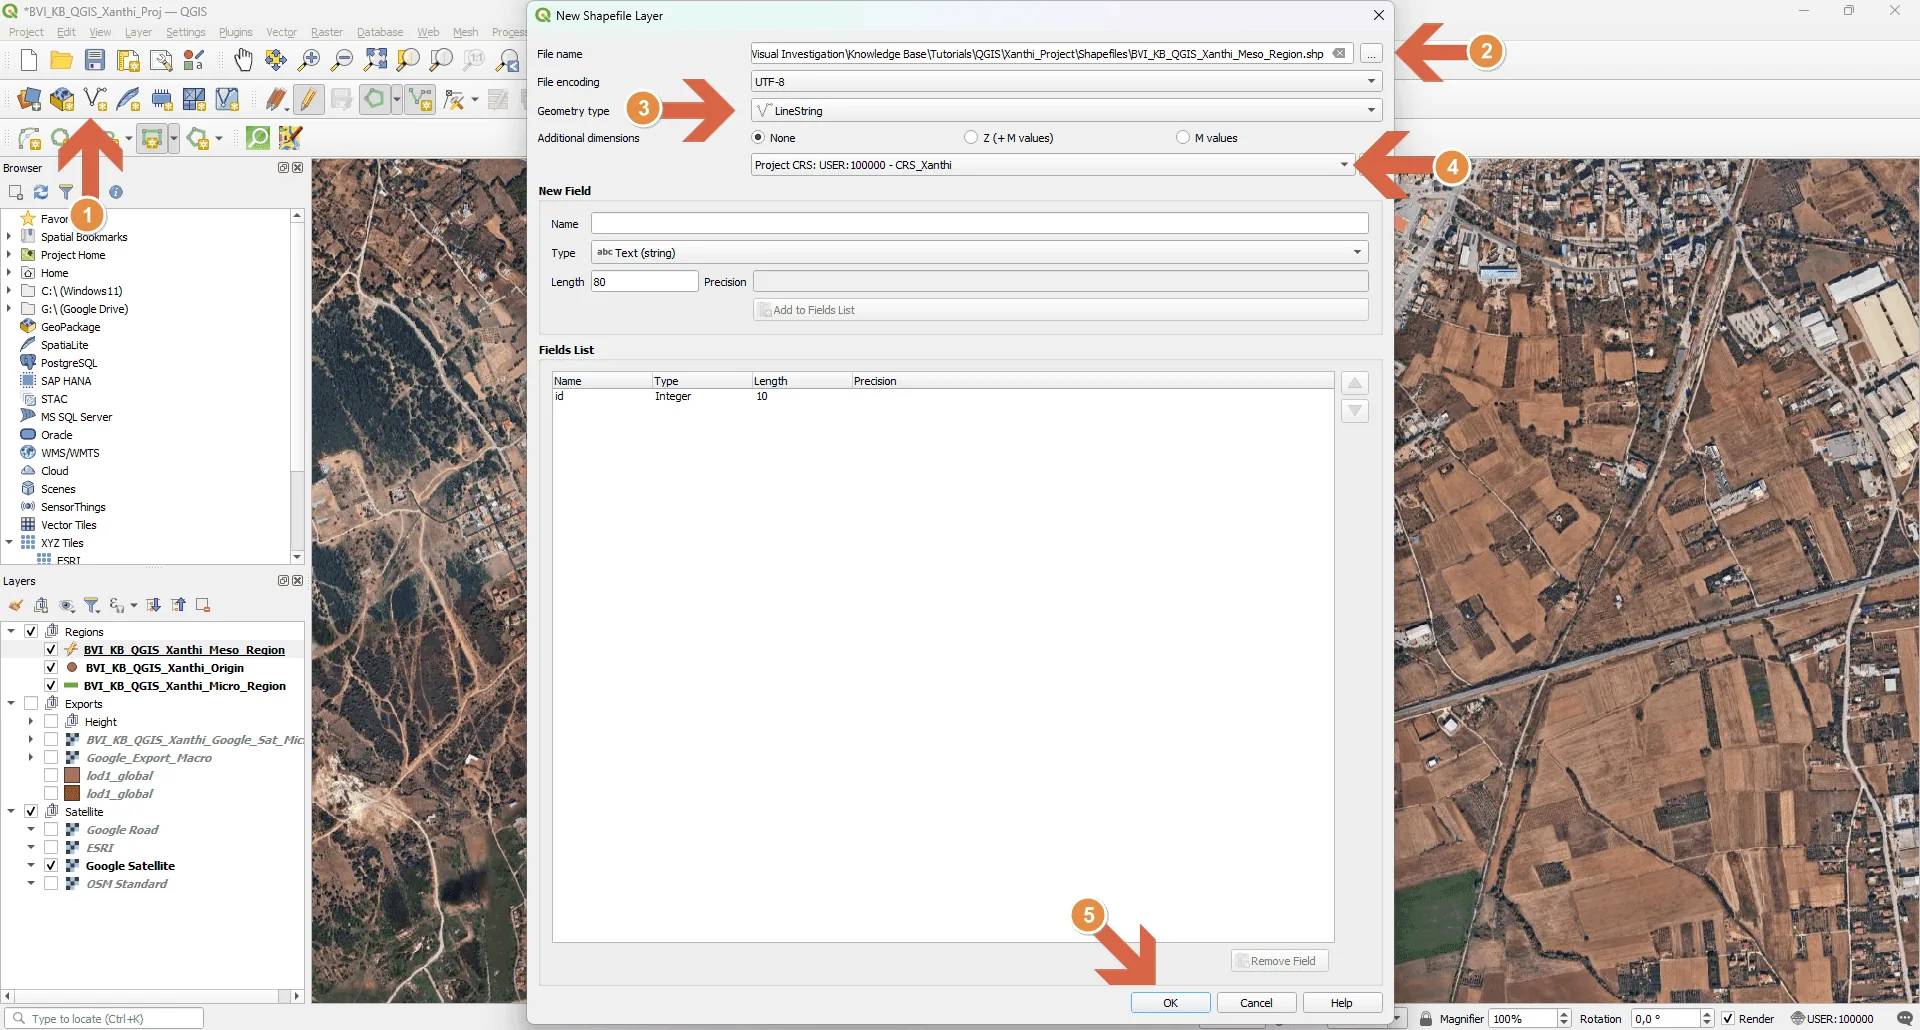 (1) Select New Shapefile layer, (2) Add name and location to save the shapefile to, (3) Set the geometry type to whichever you prefer, (4) Make sure to set the custom CRS, (5) Click 'OK'
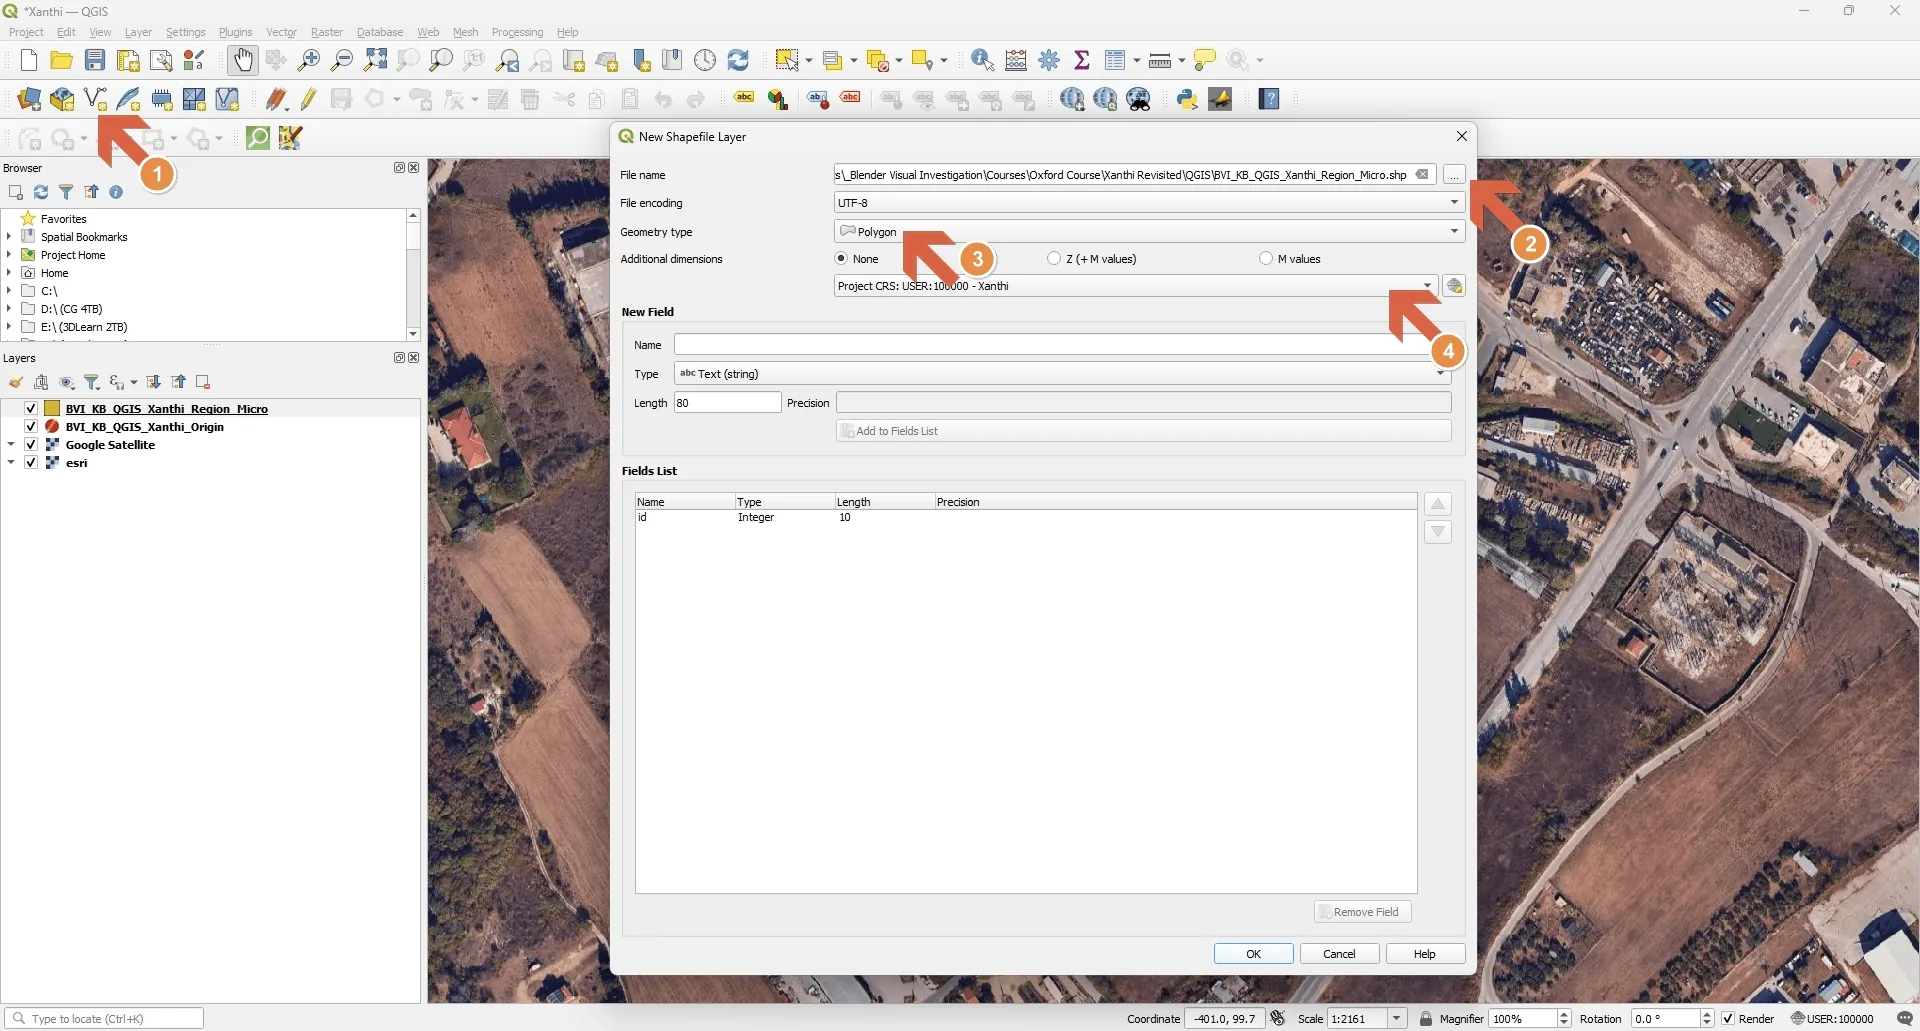 (3) I prefer a Polygon ShapeYou can style different layers by selecting a layer (1), and, for example, adjust the opacity (2) or create a colored outline (3)(1) Select New Shapefile layer, (2) Add name and location to save the shapefile to, (3) Set the geometry type to whichever you prefer, (4) Make sure to set the custom CRS, (5) Click 'OK'
In an Investigation
The baseline is the coordinate contract for the whole scene. Everything imported later only aligns if this setup is documented and followed.
- Method section: record the custom CRS parameters (latitude of origin, central meridian), the origin point location, and the boundaries of the micro, mesa, and macro capture regions.
- Decision log: why the orthographic projection at this site scale, which basemap provider and tile source you loaded, and why the region sizes you drew.
- Verification: the exported layers must align with each other in QGIS, and with the origin point in Blender (N panel, GIS tab, Geo & Proj set to zero). If they do not, the setup is wrong.
Into Blender
The baseline produces a convention, not a file: the custom CRS and the origin point. Nothing crosses into Blender until data is exported.
- Units are meters. The orthographic CRS projects to meters, so a Blender unit scale of meters is correct for everything this workflow produces.
- The origin anchors the scene. Every layer imported with BlenderGIS must be snapped so its georeferenced origin lands on (0, 0, 0), where the QGIS origin point sits.
- One CRS end to end. Any layer imported under a different CRS will not sit on the same ground. Project everything to the custom CRS in QGIS before export.
For the import steps themselves, see Data Acquisition & Export.
Limitations
- The custom CRS is local. It is valid for one site. Do not reuse it for a different location and do not expect it to hold over regional distances; orthographic projection distorts well beyond a few tens of kilometers.
- The alignment depends on the origin point being respected on the Blender side. Skipping the Geo & Proj zeroing step on import breaks the alignment without any visible error.
- Tile basemaps are rendered images. They do not carry geometry or height. Use them as a visual reference, not as a data layer.
Related
Resources
- QGIS Overview, the hub for this workflow
- Data Acquisition & Export, the next stage
- BlenderGIS, the add-on that reads the exported files
Sources
- QGIS: Working with Projections, custom CRS management
- NextGIS QuickMapServices, the basemap plugin
- Sample .blend + QGIS project (Proton Drive), the baseline result this page reproduces